Custom Branding for Event Photo Booth Prints
Last Updated: October 26, 2026
Quick Summary
To incorporate custom branding into photo booth prints, start with a one-page brief that defines the primary message, print format and brand elements. Build overlays that frame the guest photo without covering faces, place the logo where it stays readable, and check every design with a physical test print before the event.
- Write a one-page brief covering the primary message, print format, brand elements and guest action.
- Build templates at 300 pixels per inch with 1/8 inch bleed and a 1/8 inch safe zone.
- Keep logos out of faces and busy areas, and make sure they read from arm's length on a printed strip.
- Run a physical test print and get written approval before event day.
Table of Contents
- Start With the Brief: What the Branding Needs to Do
- Build Custom Photo Booth Overlays Around the Guest Photo
- Set Up Branded Photo Booth Templates Before the Event
- Choose Photo Booth Logo Placement That Stays Visible
- Pick Brand Colors and Fonts for Print Output
- Run a Test Print Before Event Day
- Add Event Photo Booth Lead Capture to Every Print
- Coordinate Vendors and Quality Control on Event Day
- Book Your Branded Photo Booth for Your Next Event
- Frequently Asked Questions
Start With the Brief: What the Branding Needs to Do
Custom branding on photo booth prints only works when you know its job first. Some events need a logo that guests can recognize at a glance. Others need a tagline, an event date, or a hashtag that drives social sharing. Every custom print template should be built around one clear goal, and that goal shapes every design choice that follows.
Before you open any design file, write down three things. For a closer look at what interactive brand activations can achieve before committing to a branded approach, review the benefits page. First, the primary message. Second, where the print will live after the event, whether that is a guest's fridge, a desk, or a social feed. Third, who needs to see the brand most. A corporate client may need the logo to stay readable on a small 2x6 strip. A wedding couple may only want their names and date in a subtle script.
Keep the brief short. One page is enough. A common mistake is asking for too many things at once, like a logo, a slogan, a sponsor list, and a call to action on a single strip. Pick the top two and build from there.
- Primary message: one sentence, such as "Thanks for joining our product launch"
- Print format: strip or 6x8
- Brand elements: logo, colors, one tagline, event name
- Guest action: follow us or share the photo
Once the brief is clear, designers and vendors can work from the same page.
Build Custom Photo Booth Overlays Around the Guest Photo
The guest photo is the star of every one of the photo booth prints. The overlay is the frame around it, and it should support the photo rather than cover it. The best custom overlays leave the center of the image open and place brand elements along the edges or in a bottom band.
Think about the space the guest's face needs. On a standard strip, the faces usually take up the middle third of each frame. Put your logo in a clean corner or along the bottom edge, where it will not cut through heads or eyes. Overlays that cover too much of the photo make guests feel like the picture belongs to the sponsor, not to them. That hurts sharing.
Use custom-branded overlays and templates to frame the guest photo. See what a custom branded photo booth adds in practice, including overlay-driven polish and guest appeal. Blurry logos are one of the most visible mistakes on event prints.
A design that looks great on a blank white canvas can disappear once real guest photos are placed behind it. If you are booking a Branded Photo Booth for Brand Activations, discuss the design during your planning call.
Set Up Branded Photo Booth Templates Before the Event
A template is the full layout: the photo area, the overlay, the text zones, and the spacing. Set up templates early. Learn how a custom backdrop photo booth complements branded templates so the whole setup feels cohesive. Build one template for each print format you plan to offer, such as a two-photo strip.
Start by mapping the photo window on each template. Place the guest photo first, then add the overlay, then add text.
Print Specifications That Keep Branding Reproducible
Most template problems trace back to a file that was never built to print specs. Lock these down before design starts:
- Dimensions: Build at the final trim size. A classic two-photo strip is 2x6 inches; a single print is commonly 4x6 inches. Confirm the exact format with the booth operator, since strip layouts vary.
- Resolution: Design at 300 pixels per inch at final size. A 2x6 strip is 600 x 1800 pixels; a 4x6 print is 1200 x 1800 pixels. Anything lower risks a soft logo.
- Bleed: Extend background color and edge elements 1/8 inch (0.125 in) past the trim on every side so small trimming shifts don't leave a white sliver.
- Safe zone: Keep logos, text, and faces at least 1/8 inch inside the trim line. This is the margin that survives cutting.
- Color mode: Use RGB for digital sharing and confirm with the printer whether the output device expects RGB or CMYK. Ask before converting, because a blind CMYK conversion can dull brand colors.
- File format: Supply layered files plus a flattened PDF or high-resolution PNG. Transparent PNG overlays let the guest photo show through cleanly.
- Fonts: Embed or outline every typeface so the printer cannot substitute a default.
Build Two Versions and Get Written Approval
Share the final templates with the client in both digital and printed proof form. A printed proof shows exactly how colors and spacing look on paper, which screens cannot fully show. Get written approval before the event, and archive the approved file with its version number so the event team loads the right one.
The print specifications below keep branded templates sharp and correctly sized on paper.
| Specification | Value | Note |
|---|---|---|
| Classic two-photo strip | 2x6 inches | Confirm exact format with the booth operator |
| Single print | 4x6 inches | Commonly used format |
| Design resolution | 300 pixels per inch | Design at final size |
| Bleed | 1/8 inch (0.125 in) | Extend past trim on every side |
| Safe zone | 1/8 inch inside trim | Keep logos, text, and faces inside |
| 2x6 strip pixels | 600 x 1800 | At 300 pixels per inch |
| 4x6 print pixels | 1200 x 1800 | At 300 pixels per inch |
Choose Photo Booth Logo Placement That Stays Visible
Logo placement decides whether the brand gets noticed or ignored. The goal is visibility without clutter. In most cases, the logo belongs in one of three places: the top corner of the print, a clean bottom band, or a small mark beside the event name.
Avoid placing the logo over busy areas of the photo. For corporate-specific guidance, see these corporate event photo booth branding tips on keeping logos visible in prints. Faces, bright lights, and patterned backgrounds all compete with a logo, and the mark often loses. If the logo must sit over the photo, consider how it will appear against the background.
Size matters too. A logo that looks fine on screen can shrink to a tiny smudge on a small strip. As a practical rule, the logo should be readable from arm's length on a printed strip. Test this with the actual print in your hand, not just in the design file.
Consider how the print will be shared. A digital copy sent to a phone screen may show the logo much smaller than the printed version. Place the logo where it stays legible even when the image is scaled down to a phone.
Keeping Text Readable on Small Prints
Text on small prints can be difficult to read when fonts are too thin, too small, or too close to the photo edge. Choose a bold, simple typeface for event names and dates.
Keep text away from the outer edges and leave a comfortable margin on all sides.
Use high contrast between text and background. White text on a dark band works well. Thin gray text on a light photo does not. When in doubt, add a solid color box behind the text.
Pick Brand Colors and Fonts for Print Output
Brand colors can look different on paper than on a screen. Consider how the colors will appear in the final design.
For fonts, consider using a maximum of two typefaces: one for headings and one for body text.
Run a Test Print Before Event Day
A test print is the single most useful step in the whole process. It reveals problems that no screen preview can show, such as cropped edges, weak logo contrast, or colors that drift too far from the brand. Treat it as a formal approval workflow with checkpoints, not a one-off favor.
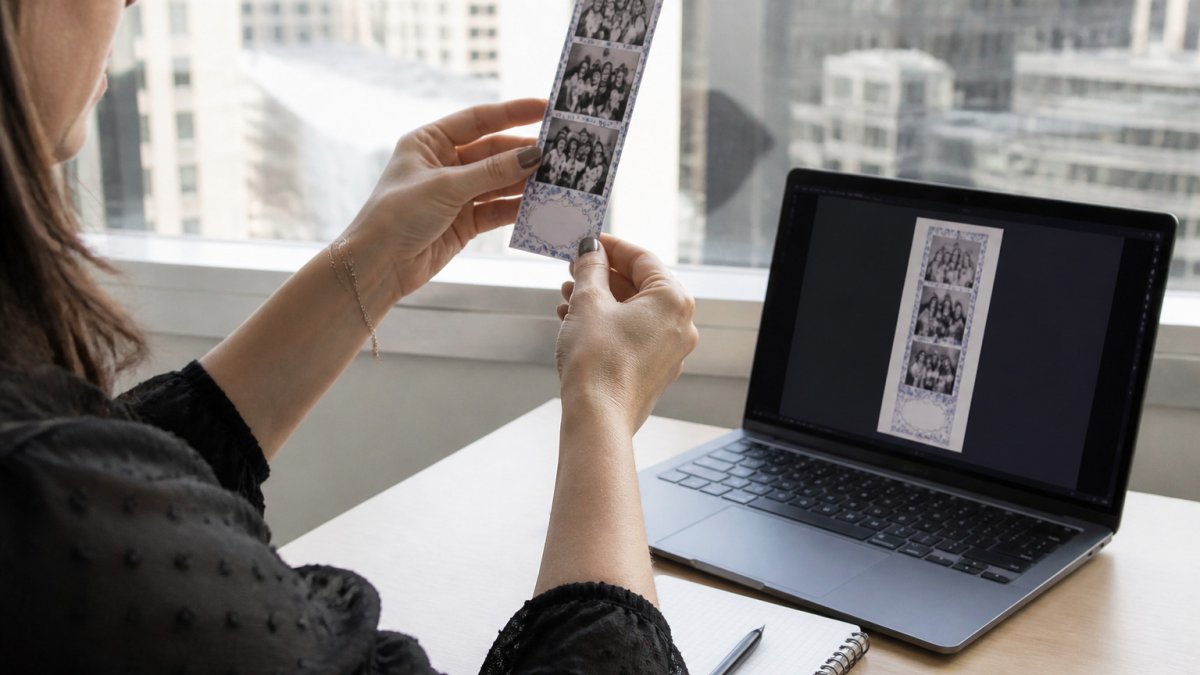
The Four Checkpoints
- Digital proof. Send the client a PDF at final dimensions with bleed and safe-zone guides visible. Confirm logo placement, text, and the event name and date. Get written sign-off.
- Physical proof. Print on the exact paper and printer settings you will use at the event. Compare the printed brand colors to the brand's color codes side by side under the same lighting. If the shift is large, adjust the file and reprint.
- Live booth test. Run a short session in the booth with a few team members acting as guests. This shows how the template looks with real poses and venue lighting, and it checks print speed and alignment.
- Event-day sign-off. At load-in, pull one print and compare it to the approved physical proof before guests arrive.
Event-Day Quality Control
Keep the approved proof and the final template file on a second device so the attendant can reload quickly if a file is corrupted. Note the venue's power and loading rules, since they affect where the booth sits and how long setup takes. Photobooth NYC's attended booths are staffed all night, so an attendant handles template switches and print checks on site, but planning ahead still reduces stress.
Handling Last-Minute Changes
After the event, collect feedback from the client and the team. Note what worked, what did not, and what to change next time. Save the final templates and proofs in a shared folder so future events can start from a tested design.
Add Event Photo Booth Lead Capture to Every Print
For corporate events, the print can do more than look good. Browse branded booth lead generation examples that turn event traffic into qualified follow-up. It can also help the brand collect leads. For corporate events, the booth can support lead and email capture.
For Corporate Event Photo Booth Rental projects, lead and email capture can be part of the activation.
Coordinate Vendors and Quality Control on Event Day
Event day brings the most pressure, so set up a clear plan with the photo booth team, the venue contact, and the client's marketing lead.
Keep a backup plan for the most likely failures. Store a spare template file on a second device and know how to switch templates quickly. Note the venue's power and loading rules, since they affect where the booth can be placed and how long setup takes. Photobooth NYC's attended booths are staffed all night, so an attendant can handle template switches and print checks on site, but planning ahead still reduces stress.
After the event, collect feedback from the client and the team. Note what worked, what did not, and what to change next time. Save the final templates and proofs in a shared folder so future events can start from a tested design.
Book Your Branded Photo Booth for Your Next Event
Custom branding can add a branded touch to a photo moment. With a clear brief and careful logo placement, a print can include a brand's message.
If you are planning a corporate event, product launch, or private celebration in Manhattan, Brooklyn, Queens, Staten Island, Nassau County, or Suffolk County, Photobooth NYC offers custom-branded print templates and staffed booth rentals. Pricing depends on package, hours, and date, and every fee is quoted upfront on the call. Check availability for your date today.
Frequently Asked Questions
What should you include on a branded photo booth print?
A branded photo booth print can include a logo, event name, or tagline. Keep the guest photo as the main element and place brand elements around it. Confirm the final layout before the event.
Where should a logo go on a photo booth print?
Place the logo in a border, footer, or corner where it does not cover faces or the main subject. Keep the logo visible and avoid placing it over busy background areas.
How can branded photo booth prints support lead capture?
For corporate events, photo booths can support lead and email capture. Photobooth NYC provides digital sharing by text, email, and QR code.

