9 DIY Wedding Photo Booth Props You Can Make This Week
Last Updated: November 15, 2026
Quick Summary
You can make a wedding photo booth prop set this week by printing bold designs on cardstock, cutting them out, and sandwiching each wooden stick between two layers of cardstock with hot glue. Build signs, speech bubbles, and wearables in two or three accent colors, then test every prop with a gentle shake before the reception.
- Keep handheld sign lettering at least one inch tall and chest-height group signs at two inches.
- A 10- to 12-inch-wide speech bubble with a blank center works best for dry-erase writing.
- Build a cardboard frame in about an hour and test it with a phone camera before the event.
- Print at 100% scale and confirm your printer is not set to fit to page.
- Ten well-made props beat thirty rushed ones, so cap your design count before starting.
Table of Contents
- What You Need Before You Start Making Props
- Wedding Photo Booth Prop Ideas That Actually Photograph Well
- How to Make a DIY Photo Booth Frame From Cardboard
- Your DIY Wedding Photo Booth Props Printable Workflow
- Attaching Sticks, Handles, and Layers So Props Survive the Night
- Backdrop, Camera, and Lighting Setup for Guest Photos
- Budget and Materials Breakdown for a Props-Only Setup
- DIY Props vs a Staffed Photo Booth: What Guests Notice
- Check Availability for Your Wedding Date
- Frequently Asked Questions
What You Need Before You Start Making Props
A DIY wedding photo booth props tutorial only works if you gather everything before the first cut. The most common mistake we see is starting with one sheet of cardstock, no backup, and a dull pair of scissors. Halfway through, the bride's sign droops and the groom's mustache curls.
Here is the short list of what actually matters:
- Cardstock, not printer paper. Standard paper curls the moment a guest lifts it. Go for a heavier weight so signs stay flat in photos.
- Wooden craft sticks and skewers. Craft sticks for small signs, longer skewers for anything that has to clear a guest's face.
- Glue and tape. A glue stick for paper-on-paper, double-sided tape for clean edges, and hot glue for anything structural.
- Scissors and a craft knife. Scissors for curves, a knife and cutting mat for straight cuts and window cutouts.
- A printer that handles cardstock. Most home printers will feed it, but test one sheet first.
- A backup sheet of every design. One crumpled prop at 9 p.m. is one prop too many.
Lay it all out on a table before you print anything. The assembly line moves faster when nothing is missing.
Wedding Photo Booth Prop Ideas That Actually Photograph Well
The best wedding photo booth prop ideas share one trait: they read instantly at arm's length. A prop that needs explaining in the photo is a prop that fails. Guests grab, pose, and shoot in under a minute, so build for big shapes, thick lettering, and high contrast against your backdrop.
Wedding-Ready Wording That Lands in Photos
Generic party phrases work, but wedding-specific wording is what makes the props feel like they belong at your reception. Build a set around three buckets:
- The couple: "Just Married," "Mr. & Mrs. [Last Name]," "The [Last Name]s," "Happily Ever After," "I Do Crew."
- The guests: "Best Day Ever," "Here for the Cake," "Plus One," "Catching the Bouquet," "Single and Ready to Mingle," "Team Bride," "Team Groom."
- The moment: "Cheers," "Finally," "Worth the Wait," "Kiss the Bride," "Last Dance."
Keep lettering at least one inch tall for handheld signs and two inches tall for anything that will be held at chest height in a group shot. Thin script fonts disappear at phone-camera distance; a bold sans-serif or a heavy slab reads better in every frame.
Signs and Speech Bubbles
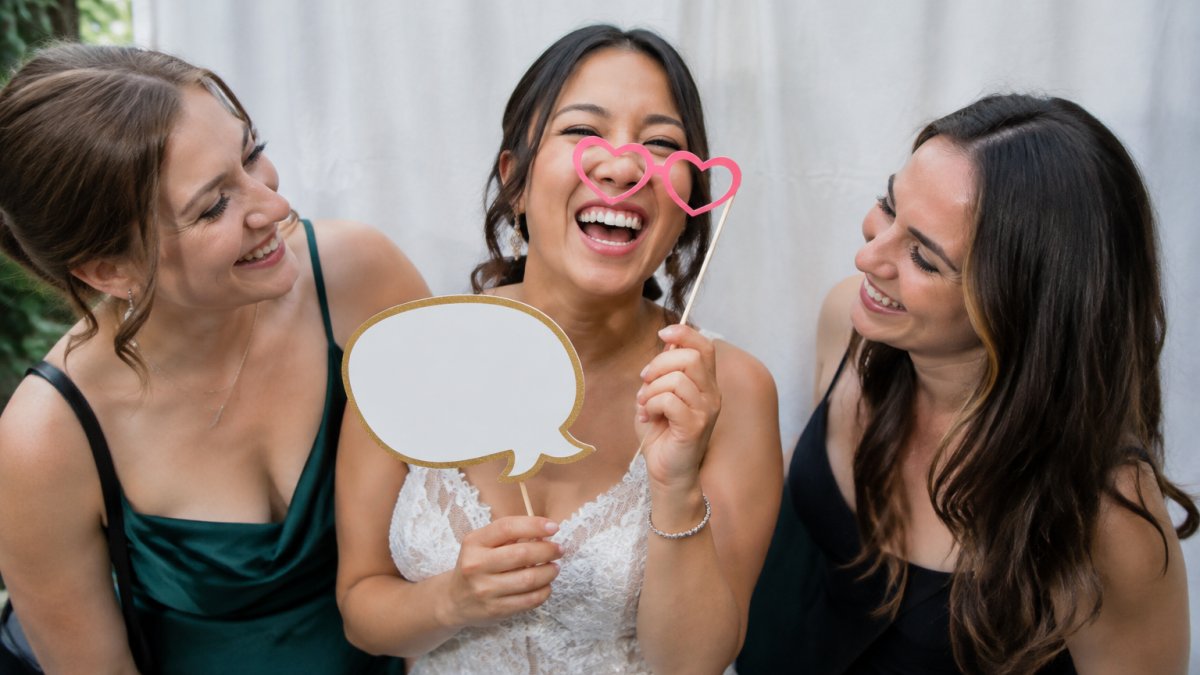
Speech bubbles are the workhorse of any DIY wedding photo booth props printable set. Cut the bubble shape from cardstock, leave a blank white center, and let guests fill it in with a dry-erase marker. A 10- to 12-inch-wide bubble is the sweet spot: big enough to read across a room, small enough to hold one-handed. Laminate the blank center if you want it to survive a full reception of writing and erasing.
Wearables and Handheld Props
Mustaches on sticks, paper bow ties, top hats, and oversized lips are the classics for a reason. They photograph well because they sit near the face and frame it. Add a few that match your theme: paper flower crowns for a garden wedding, small paper bow ties for a black-tie crowd, or tiny paper veils for the bridesmaids. For a cohesive set, pick two or three accent colors that match your palette and repeat them across every prop, a single metallic plus one soft tone is enough.
Personalization That Ties the Set Together
A props set feels designed rather than assembled when it carries the couple's names, the date, and one motif from the invitation. Print the names and date on the frame, on a large "The [Last Name]s" sign, and on a small date-stamp prop. If you have a monogram or crest from your stationery, reuse it at the top of the speech bubbles. Matching the props to your signage and table numbers is the cheapest way to make the photo area look intentional.
Durability and Accessibility
Props get handled by guests of every age, so build for the least gentle hand in the room. Sandwich every stick between two layers of cardstock, add a paper brace at the joint, and keep the largest signs under about 14 inches wide so they stay light enough to hold for a full pose. Offer a short-handled version of the popular props for kids and for guests who use wheelchairs or have limited grip, a 6-inch stick is easier to manage than a 12-inch skewer. Round every corner with scissors so nothing snags a dress or a sleeve.
If you want help matching props to your palette and theme, our guide on how to choose wedding photo booth props for any theme walks through pairing options.
How to Make a DIY Photo Booth Frame From Cardboard
A DIY photo booth frame cardboard build takes about an hour and gives you the single most-photographed prop of the night. Here is the sequence we would follow:
- Cut the frame. Draw a rectangle on corrugated cardboard with a window opening sized for two faces. A craft knife on a cutting mat gives clean edges.
- Reinforce the corners. Tape the back of each corner with packing tape so the frame does not fold when guests hold it.
- Wrap the front. Cover the cardboard with metallic paper, fabric, or paint. Metallic gold and silver read best under low reception lighting.
- Add the wording. Paint or cut out "The [Last Name]s" or "Mr. & Mrs." along the top bar. Thick lettering, high contrast.
- Attach handles. Tape two short wooden dowels to the back so two guests can hold the frame steady while a third shoots the photo.
Watch out: a frame that is too large will not fit inside a phone's field of view at close range. Test it with a phone camera before the event and trim if guests have to step back to fit it in.
Your DIY Wedding Photo Booth Props Printable Workflow
A clean DIY wedding photo booth props printable workflow saves more time than any other step. The order matters: design, size, print, cut, assemble.
Start in a free design tool and build every prop on one canvas at your final print size. Export as a PDF, not a JPG, so sizing stays locked. Print one test sheet on plain paper, hold it up to a guest's face, and adjust before you commit cardstock.
Sizing, Print Files, and Cut Files
Signs should be wide enough to read across a room, roughly the width of a dinner plate. Wearables should sit between the chin and the forehead. Print at 100% scale and confirm your printer is not set to "fit to page," which silently shrinks everything.
Keep two folders: one for print files, one for cut files. If you are using a cutting machine, export an SVG cut file alongside the PDF so the machine traces the same outline you designed. For hand cutting, print a thin outline in light gray so the line disappears in the final photo.
Attaching Sticks, Handles, and Layers So Props Survive the Night
Sticks fail for one reason: the adhesive gives out under the weight of the prop. Fix the attachment before it becomes a problem.
- Sandwich the stick. Glue the stick between two layers of cardstock so the paper grips it on both sides.
- Use hot glue for weight. A glue stick holds paper to paper; it will not hold a heavy sign to a skewer.
- Add a paper brace. Cut a small rectangle, fold it over the stick, and glue it flat against the back of the sign.
- Layer for depth. Stack a colored shape on a white backing so the prop reads as one solid object instead of a thin cutout.
Test every finished prop by holding it by the stick and giving it a gentle shake. If it flexes, reinforce it now. Guests will not be gentle.
Backdrop, Camera, and Lighting Setup for Guest Photos
A great prop in bad light is a bad photo. The setup matters as much as the craft.
Hang a fabric curtain or a plain sheet as your photo back drop, pulled taut so it does not wrinkle. Position it away from a wall so guests have room to step back. For lighting, place your main light source in front of guests, not behind them, so faces stay bright. If you are using a phone or tablet as your camera, mount it at chest height on a tripod and use a remote or a start button app so guests can trigger the shot themselves. A DSLR with an external flash gives cleaner results, but the phone setup is faster to run. For a deeper look at getting flattering portraits, our guide on photo booth lighting tips for flawless event photos covers positioning and skin tones.
Budget and Materials Breakdown for a Props-Only Setup
A props-only setup is the cheapest way to add a photo moment, but the cost adds up faster than people expect. The real budget line is not the cardstock, it is the time. Here is a realistic per-item breakdown for a set of about ten props, priced at typical U.S. craft-retail levels, with a lower-cost substitution for each line.
| Item | Typical Spend | Lower-Cost Swap |
|---|---|---|
| Cardstock (2-3 packs, mixed colors) | $15-$30 | Use one white pack and paint accents |
| Wooden craft sticks and skewers | $5-$10 | Reuse sticks from a prior event |
| Adhesives (glue stick, double-sided tape, hot glue) | $10-$20 | Glue stick plus tape only |
| Scissors and craft knife | $10-$25 | Use what you already own |
| Cutting mat | $10-$20 | A sturdy cardboard sheet works |
| Printer ink for cardstock runs | $15-$40 | Print at a copy shop per sheet |
| Backdrop fabric or sheet | $15-$40 | A plain sheet from home |
| Tripod and phone holder | $20-$40 | Prop the phone on a stable shelf |
| Dry-erase markers for speech bubbles | $5-$10 | One black marker |
Typical Spend
The line that creeps up most is reprinting failed sheets, so test one sheet on plain paper before you commit cardstock.
Set a hard cap on the number of designs before you start. Ten well-made props beat thirty rushed ones, and the guests will only reach for the ten. If you are weighing this against other guest entertainment, our guide on planning wedding guest entertainment on a budget helps you compare the trade-offs.
DIY Props vs a Staffed Photo Booth: What Guests Notice
Guests notice two things at a photo station: whether the line moves, and whether the photo looks good. DIY props can deliver the first. The second is where a staffed booth pulls ahead.
A staffed booth has a trained attendant on site all night, so guests walk up, pose, and get their print and a digital copy sent to their phone. If you are comparing the two paths, our guide on what a luxe wedding photo booth rental actually delivers breaks down what guests remember.
Check Availability for Your Wedding Date
The props are the easy part. The hard part is the night itself, when the line builds and someone has to keep the camera running. That is the job we take on. At Photobooth NYC, a trained attendant stays on site all night, guests get instant prints plus digital delivery to their phones by text, email, or QR code, and every booth includes custom-branded templates and a curated prop and backdrop setup. Booths range from $1,495 to $5,250 per booth depending on package, hours, and date, with every fee quoted upfront on the call. We serve Manhattan, Brooklyn, Queens, Staten Island, and Long Island.
Planning the rest of your booth decision? Our guide to choosing a wedding photo booth covers the questions to ask any vendor before you sign. Then check availability for your date and we will confirm what fits your venue and guest count.
Your date is the one thing that will not wait. Venues book out, and the best weekends go first. Get started with Photobooth NYC and lock in a booth that keeps your guests moving and your photos sharp all night.
Frequently Asked Questions
What materials work best for DIY wedding photo booth props?
Cardstock and foam board are the two workhorses. Cardstock is easy to print on at home and holds a clean edge when cut; foam board adds stiffness for larger shapes like a cardboard frame or oversized signs. Wooden craft sticks and skewers handle the holding, and a low-temperature glue gun or double-sided tape keeps layers flat. Add a self-healing cutting mat and a sharp craft knife for clean lines. Avoid flimsy printer paper for anything guests will wave around, because it curls and tears by the second round of photos.
How many props should you make for a wedding photo booth?
Plan for eight to twelve pieces for a guest list of 100, split across signs, wearables, and handheld shapes. Fewer than eight and guests run out of variety by the second hour; more than fifteen and the table turns into clutter that nobody sorts through. Group them by theme so people can build a look in one grab. If you are printing templates, print two copies of the most popular signs so two groups can pose at once without waiting.
Can you make printable wedding photo booth props at home?
Yes, and a home inkjet handles most of it if you stick to letter and legal paper sizes. Download or design a print file, set the scale so the sign reads clearly at arm's length, and print on 65 lb or heavier cardstock. For oversized shapes, tile the design across multiple pages and join them with tape before cutting. A local print shop is the better call for anything larger than legal size or for foam board mounting, since most home printers cannot feed thick board.
How do you make photo booth props that guests can hold?
Attach a wooden stick to the back, not the front, so it never blocks the design. Run a bead of hot glue along the top two inches of the stick, press it to the back of the prop, and add a small cardstock square over the joint as a brace. Let it cure flat for a few minutes. For heavier pieces, use two sticks angled outward like a tripod. Test each prop by holding it at arm's length and shaking it gently before the event.

